
Laptop and eGPU Part 2 – Software
Disable Integrity Protection
OSX El Capitan needs the disable integrity protection to run the modified Nvidia Drivers
- Shutdown your Mac.
- Press the power button and immediately hold down Command + R until you see the apple logo
- Now your Mac will be in Recovery Mode. Open up Utilities -> Terminal
- Run the following command:
csrutil disable - You should see text confirming that integrity protection is now disabled.
- Now restart your Mac.
Install Cuda and Libraries
Both of these require a nvidia developer account which is free but requires an email address.
Install CUDA Toolkit 7.5 from: https://developer.nvidia.com/cuda-downloads. Its a dmg so click your way through it.
Install cuDNN v5 from: https://developer.nvidia.com/rdp/cudnn-download. This will just be a tarball, you will need to do something like this:
Connecting eGPU Procedure
We just installed cuda libraries, so your Mac should be on and logged in. The thunderbolt connection between the Akitio board to your laptop should be disconnected. Power on the eGPU via the green power switch connected to the SWEX as described in part 1. Wait a few seconds and connect the thunderbolt cable to the Mac. If you are just getting started then proceed to the driver install step, otherwise or generally, restart your Mac.
I’ve had problems lately with “cold” eGPU and MacBook power up so the pervious “warm” power up procedure is the best way to prevent your MacBook not booting up.
Install Nvidia Drivers
The stock Nvidia driver will not work out of the box. You will need the eGPU powered on and connected over Thunderbolt. Here is how to use an automated patcher:
You should see the model of GPU connected in the console output. Now restart your Mac
Nvidia Samples
eGPU is working! Here is some sample output but poke around in that directory for the fun visuals….
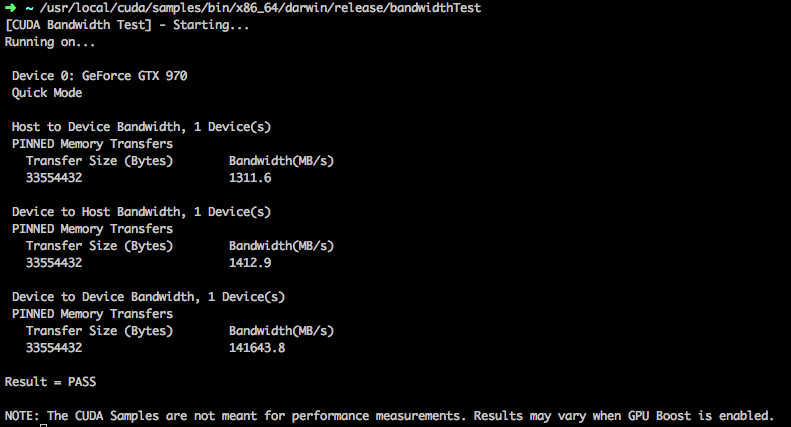
Installing Torch
Quick install instructions from torch website
After restarting your shell, you should be able to type th and get the Torch shell.
Installing Torch+CUDA Things
Trying to get cudnn for torch gave me some trouble:
From stackover flow need to install 7.2 cli tools…here is the procedure:
- Run
clang --version - Go to https://developer.apple.com/download/more/, log in
- Download Command_Line_Tools_OS_X_10.11_for_Xcode_7.2.dmg, and install
- Run the following command to switch to the old version:
sudo xcode-select --switch /Library/Developer/CommandLineTools - Run the following command to quickly check clang version:
clang --version
This reverted clang from Apple LLVM version 7.3.0 (clang-703.0.29) [step 1] to Apple LLVM version 7.0.2 (clang-700.1.81) [step 5]
You will need to repeat this after a OS upgrade or Xcode upgrade
Now we can install cudnn successfully:
And run the tests:
Should see a lot of green with no failures or errors.
Conclusion
Success! Just to be clear, the stack built here is: Cuda 7.5 + cuDNN R5 + Torch 7 on a 13″ MacBook with an eGPU (Nvidia Geforce GTX 970) on OSX El Capitan 10.11.4 using Xcode 7.2. I have to say that over all getting to this spot was riddled with minor issues, complications, and a far too much nuance. Hopefully, these lessons learned will put your DeepLearning stack together without too much pain.